
A. "There is an obvious cost savings to grow from seed," said Molly Cross, a volunteer speaker for the Habitat Environmental Center in Kettering. Cross also serves as a biology teacher and Ohio State University Master Gardener volunteer. A seed packet is far less expensive than a flat of nursery plants.
“Another advantage is you know exactly where your seed came from and the growing practices used to grow them,” Cross explained. “Buy seeds that are non-GMO and from reputable growers and suppliers. Research the growing mediums and fertilizers and how they are produced. Local, privately owned nurseries are also a good resource for quality seeds.”
Although you may be imagining long tables with expensive UV lights, the equipment needed is minimal and can be sustainable. “There are also some frugal ways to grow in recycled containers, like milk cartons cut in half. Other compostable seed growing containers are paper egg cartons, and toilet paper and cut paper towel cardboard rolls,” Cross said.
Q. Approximately when should seeds be sown indoors?
A. According to the USDA's Natural Resources Conservation Service, "The first step … is to determine the last 'frost-free date' for your area. This information is generally available at University Extension Service Offices and local garden supply stores." The date will help you know when it's safe to plant outside.
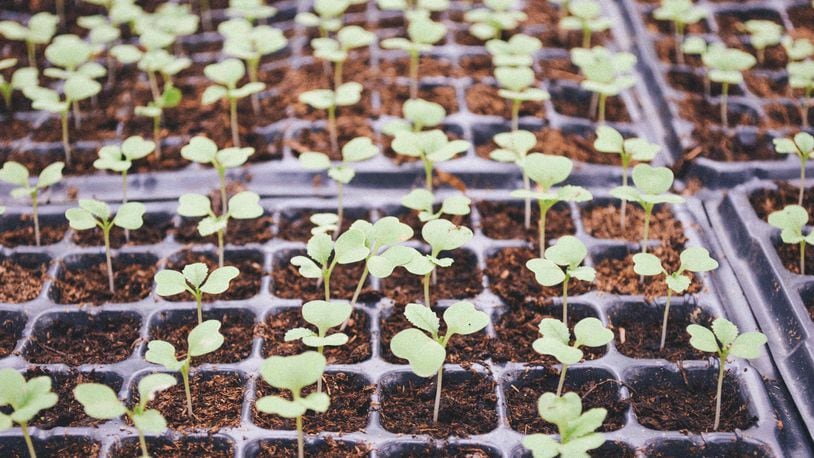
The Miami Valley is in Hardiness Zone 6a. Cross cautioned, “Be sure to select plants that are tolerant of the temperatures for this zone. In the winter months, overeager gardeners may be fooled into sowing seeds outside too soon. Seedlings that are held indoors too long perform poorly once transplanted into the garden, and crowded seedlings waiting for transplant also do not fare well. Most seeds should be sown four to 12 weeks prior to transplanting into the garden. The time it takes for seedlings to be ready varies with the plant species. “
Q. Is this a project that beginning gardeners should undertake? What are some tips you would give to beginners?
A. "Absolutely!" Cross said. "Prepare by reading and keeping it simple the first year or two. Gardening books and educational websites like The Ohio State University Extension give great info." Whether you're brand new to gardening or an old pro, it's always important to read the seed packets carefully.
“I always suggest that the beginning gardener … start simply and small the first year or two. If you love tomatoes, then try a few varieties of just tomatoes, rather than trying to grow your entire veggie garden indoors first! Also, start with one flat of seedlings so that you can manage the lighting, watering and then transplanting,” Cross said. “My biggest tip is to be sure and use plant labels and a Sharpie with the name and the planting date. I also keep the original seed packet and clip it to a taller plant label. I keep a notebook with the date and what plants were sown. I use this to make sure I remember what I am growing and to help gauge growing time.”
Q. What are some guidelines for transplanting the seedlings outdoors?
A. Careful handling is everything, according to the USDA NRCS: "When transplanting a seedling…carefully work the seedling from the tray with a small knife or similar tool. Be careful not to dislodge the growing medium or damage the plant stem." If this makes you nervous, you can choose to plant the seeds in cell packs or peat pots.
“Getting your baby plants ready for the big outdoors is called acclimation (hardening off), and all seedlings need this time period before placing them into the permanent growing site. If seedlings are not hardened off, the leaves may either be burned by the intensity of the sun, damaged by the wind or dry out,” Cross said. “One way to acclimate the plans is to first place them in a cool, protected location on a patio or porch. They can be covered with a plastic dome, if it is vented. If a cold-frame is used, it should be vented and opened during the day, and partially shaded. The cold frame is a glass or plastic covered frame without heat used to protect seedlings.” Be sure to have your garden soil ready, prepared and dug prior to planting in the ground.
The UDSA NRCS explained, “After a couple of days, move the plants into direct sunlight but keep them covered. … After about five days, remove the cover and allow gentle breezes to ‘work’ the plants. Be sure to keep the bedding plants well watered, as they will tend to dry out more quickly in an outdoor environment. After about a week, the plants should be ready to plant in the garden.”
When the plants are in the ground, Cross said, “Gently water the seedlings in the soil with transplanting solution of 1 Tablespoon of a water soluble 20-20-20 fertilizer to a gallon of water.”
Want to learn more?
WHAT: Parsley Pots for Pollinators class
WHERE: Habitat Environmental Center, 3036 Bellflower St., Kettering
WHEN: Saturday, April 29, 1 to 2 p.m.
COST: $5 Kettering residents/$7 nonresidents
REGISTER: www.playkettering.org
About the Author